
Hosting Jekyll locally
Continuing on how to build a static blog, I’ll explore today how to host a local version of Jekyll.
Jekyll is a great engine that converts markdown documents into html pages. It is simple enough to learn and to use and it currently powers this website. There’s good documentation on how to install it and how to use it and you should definitely have a look.
It uses a Ruby environment. Well, apart from a hello world I am not a Ruby developer and I didn’t want to install yet another language in my PC, especially as I was just experimenting with Jekyll as the blog engine. The solution was to use Docker.
Docker
Docker is great for these small things that you’d like to try but don’t necessarily want to install. Windows has a historical tendency to dislike too many things installed and will eventually need a fresh factory reset. By then finding out all the requirements to everything that you do becomes a long and undesirable exercise.
I don’t have the most favourable docker environment - it works on Windows but it isn’t where you get the best performance, but it is fine for my current requirements.
Jekyll on Docker
As I didn’t want to install other dependencies and languages on my box just to test that the blog worked, I decided to do everything that I needed on a docker image. That way I wouldn’t have to know much about yet another environment and could quickly get everything up and running.
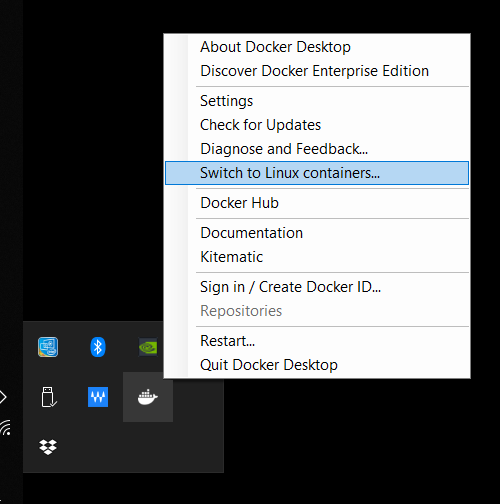
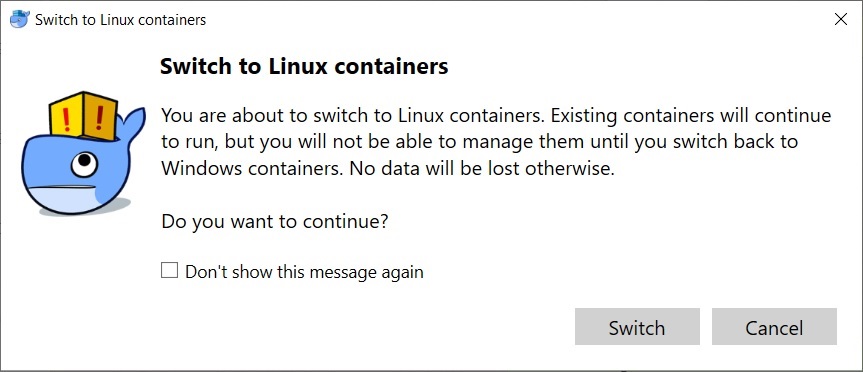
I started by making Docker use Linux containers with a right click on the taskbar icon:
Confirm that you want to continue, wait a few seconds and you are ready to go.
We will use the official Jekyll Builder image for docker. On a powershell execute this command:
docker run --rm --label=my-local-jekyll --volume=C:\Blog:/srv/jekyll -it -p 127.0.0.1:4000:4000 jekyll/builder jekyll serve
This will:
runrun the container--rmremove the container when we’re finished--label=my-local-jekyllgive it a nice name--volume=C:\Blog:/srv/jekylluse the directory “C:\Blog” as the local path for files. You may have to create this directory first-itrun the container in interactive mode. This makes it easier to see outputs-p 127.0.0.1:4000:4000map the container internal port 4000 to my localhost port 4000. This allows me to browse to the created blogjekyll/builderDownload the image “jekyll/builder”. This is the official onejekyll servecommand to be executed on the container.
And this is what we get:
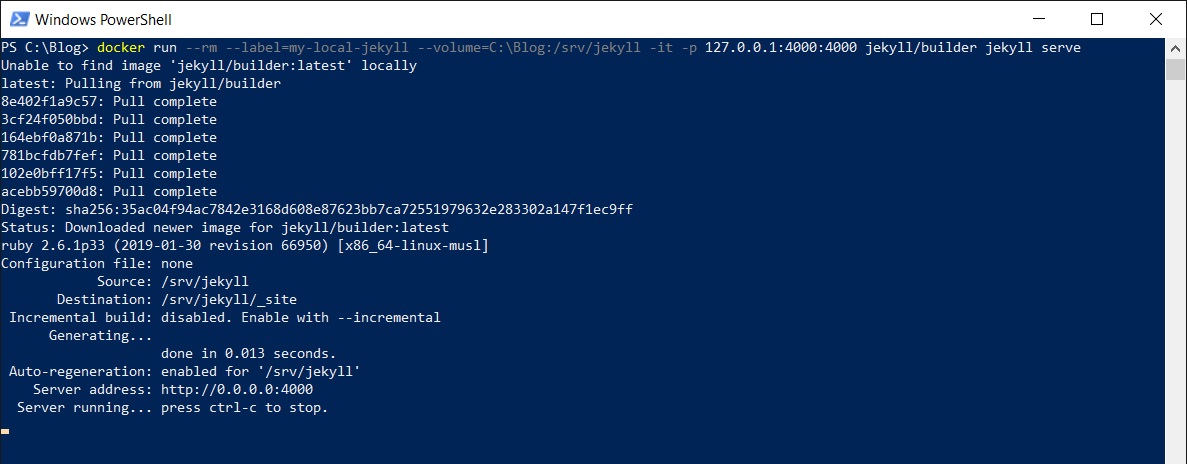
Note that it downloads the image first and then starts the container. It won’t need to download the image again.
Get a sample blog on Jekyll
If you’d like to have an empty blog created for you, run this:
docker run --rm --label=my-local-jekyll --volume=C:\Blog:/srv/jekyll -it jekyll/builder jekyll new .
And you will get this output:
PS C:\Blog> docker run --rm --label=my-local-jekyll --volume=C:\Blog:/srv/jekyll -it jekyll/builder jekyll new .
ruby 2.6.1p33 (2019-01-30 revision 66950) [x86_64-linux-musl]
Running bundle install in /srv/jekyll...
  Bundler: Fetching gem metadata from https://rubygems.org/...........
  Bundler: Fetching gem metadata from https://rubygems.org/.
  Bundler: Resolving dependencies...
  Bundler: Fetching public_suffix 3.0.3
  Bundler: Installing public_suffix 3.0.3
  Bundler: Fetching addressable 2.6.0
  Bundler: Installing addressable 2.6.0
  Bundler: Using bundler 2.0.1
  Bundler: Fetching colorator 1.1.0
  Bundler: Installing colorator 1.1.0
  Bundler: Fetching concurrent-ruby 1.1.5
  Bundler: Installing concurrent-ruby 1.1.5
  Bundler: Fetching eventmachine 1.2.7
  Bundler: Installing eventmachine 1.2.7 with native extensions
  Bundler: Fetching http_parser.rb 0.6.0
  Bundler: Installing http_parser.rb 0.6.0 with native extensions
  Bundler: Fetching em-websocket 0.5.1
  Bundler: Installing em-websocket 0.5.1
  Bundler: Fetching ffi 1.10.0
  Bundler: Installing ffi 1.10.0 with native extensions
  Bundler: Fetching forwardable-extended 2.6.0
  Bundler: Installing forwardable-extended 2.6.0
  Bundler: Fetching i18n 0.9.5
  Bundler: Installing i18n 0.9.5
  Bundler: Fetching rb-fsevent 0.10.3
  Bundler: Installing rb-fsevent 0.10.3
  Bundler: Fetching rb-inotify 0.10.0
  Bundler: Installing rb-inotify 0.10.0
  Bundler: Fetching sass-listen 4.0.0
  Bundler: Installing sass-listen 4.0.0
  Bundler: Fetching sass 3.7.3
  Bundler: Installing sass 3.7.3
  Bundler: Fetching jekyll-sass-converter 1.5.2
  Bundler: Installing jekyll-sass-converter 1.5.2
  Bundler: Fetching ruby_dep 1.5.0
  Bundler: Installing ruby_dep 1.5.0
  Bundler: Fetching listen 3.1.5
  Bundler: Installing listen 3.1.5
  Bundler: Fetching jekyll-watch 2.1.2
  Bundler: Installing jekyll-watch 2.1.2
  Bundler: Fetching kramdown 1.17.0
  Bundler: Installing kramdown 1.17.0
  Bundler: Fetching liquid 4.0.3
  Bundler: Installing liquid 4.0.3
  Bundler: Fetching mercenary 0.3.6
  Bundler: Installing mercenary 0.3.6
  Bundler: Fetching pathutil 0.16.2
  Bundler: Installing pathutil 0.16.2
  Bundler: Fetching rouge 3.3.0
  Bundler: Installing rouge 3.3.0
  Bundler: Fetching safe_yaml 1.0.5
  Bundler: Installing safe_yaml 1.0.5
  Bundler: Fetching jekyll 3.8.5
  Bundler: Installing jekyll 3.8.5
  Bundler: Fetching jekyll-feed 0.11.0
  Bundler: Installing jekyll-feed 0.11.0
  Bundler: Fetching jekyll-seo-tag 2.5.0
  Bundler: Installing jekyll-seo-tag 2.5.0
  Bundler: Fetching minima 2.5.0
  Bundler: Installing minima 2.5.0
  Bundler: Bundle complete! 4 Gemfile dependencies, 29 gems now installed.
  Bundler: Bundled gems are installed into `/usr/local/bundle`
New jekyll site installed in /srv/jekyll.
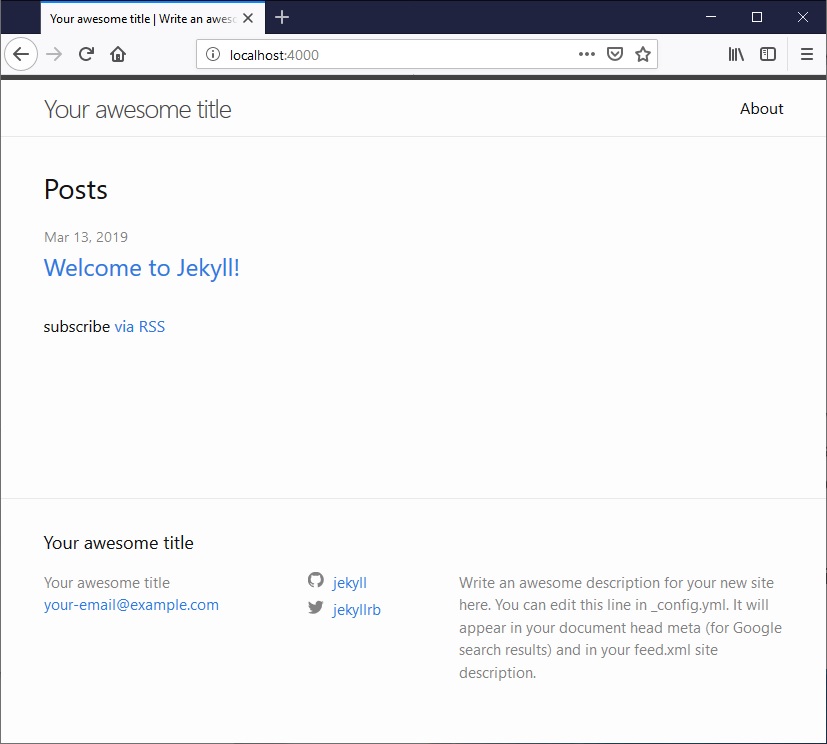
Jekyll created a new site on the folder that we specified. After you start the container again with the first command that we’ve tried (… jekyll serve), this time it will download some new gem data and serve the empty blog, which you will be able to see by going to http://localhost:4000/
Monitor file changes
The last bit is to make sure that Jekyll rebuilds the site every time that a file is saved. In order to do that, we need to change the docker command to keep watching for file modifications, and for that we add the following command options:
--watch --incremental --force_polling
The --force_polling is mostly required because we are on Windows with Linux containers. If you were using docker on anything else it’s unlikely that you would need it.
The final command is then:
docker run --rm --label=my-local-jekyll --volume=C:\Blog:/srv/jekyll -it -p 127.0.0.1:4000:4000 jekyll/builder jekyll serve --watch --incremental --force_polling
And every time you modify your files, Jekyll will automatically rebuild the site for you and you can instantly refresh your browser to see how things are looking like. That is quite neat.

Leave a Comment
Your email address will not be published. Required fields are marked *